I love Deviled Eggs. Who’s with me?
Not just any old deviled eggs, either. Truth be told, I have had my share of really bad deviled eggs over the years (and the store-bought kind are about the worst on the planet).
To love deviled eggs like I do, they must be good…and I mean they have got to be eat-’em-like-candy-good. The filling is key to a really good Deviled Egg, but so is the presentation.
I am famous (with family and friends, at least) for my deviled eggs, but I dreaded making them. Why? Because I never knew how (if at all) the blasted shells are going to come off the hard-boiled egg. It’s not that I am challenged in making one heck of a delicious deviled egg filling; it’s getting to the filling that tests one’s patience–hoping that the shell is going to peel off without a hitch to present a perfect, shiny hard-boiled egg. Can anyone out there relate?
It doesn’t matter what I tried: fresh eggs–two-week-old eggs–organic eggs, or brown eggs. Sage advice says: boil the eggs in vinegar water (what a joke) or plunge them immediately in ice water, and I don’t even want to mention the horror I experienced with the “EGGSTRACTOR Egg Peeler.” Yes, I was that desperate.
No matter what I did, sometimes the peeling would work out beautifully, much to my relief, but more often than not, the shell stuck to the eggs so that the white peeled off with the shell in little itty-bitty pieces, leaving one ugly egg–pitted and pitiful. Frustrating is an understatement. It was that throw-them-all-against-the-wall moment. By the time I was finished, the egg no longer looked like an egg at all–fit only for egg salad or the dog bowl.
Over the years, I have tried everything known to man to try to get the shell off perfectly every single time with no success. Until…NOW!
Enter the Power XL pressure cooker. Yes! A pressure cooker! I had just purchased this new gadget at Costco and was putting it through the rigors of cooking everything I could think of–I just love new kitchen gizmos. Then it dawned on me. What would happen if I tried pressure-cooking hard-boiled eggs? Hope springs eternal, right?
So I tried it!
And guess what? The eggs turned out PERFECTLY. Yup, that’s right! I was over the moon happy!
After a few taps on the shell, the first egg peeled beautifully. The shell slipped off the egg like silk on a doorknob. It took only minutes to peel 18 extra-large beauties. My husband (who is completely lost in the kitchen and has unfortunately witnessed my frustration more than once with peeling eggs) even stood there amazed at the short work I was making out of the task. Not a single egg white was damaged. The magic is in the pressure of the cooker. It was a thing of beauty, and just like that, I was finally delivered from the pit of eggshell-peeling hell forevermore!
Try it at home yourself. I promise you, it will work every single time. Make sure you set the eggs on the steamer shelf and not directly in the water. Set the timer to 5 minutes and let the steam escape naturally for another 5 minutes, then remove the eggs to cool. This is my fourth time making deviled eggs with my new pressure cooker with zero issues. (One caveat: occasionally, there may be an egg or two that cracks or bursts open–so I always put in a few extra eggs, just in case).
I now look forward to the task of making deviled eggs. It is a sincere pleasure. In fact, I just whipped up 36 beautiful little devils for a potluck tonight. They will be a hit, as always.
The bottom line: I will never, ever boil eggs on the stove again.
For those who are interested, I am providing my deviled egg filling recipe. This recipe will yield a generous filling for 18 eggs/36 halves. I never measure exactly, so the amounts given are approximate. I’ve been making these for so long, I just throw it all together so it has the consistency of cake frosting. I like to pipe the filling into the eggs for a pretty presentation, but you can spoon it in just fine, too.
- 18 hard-boiled egg yolks broken up with a fork or pastry cutter
- 1.5 to 2 cups good quality mayonnaise
- 2 tablespoons Grey Poupon mustard or yellow mustard
- 1/8 to 1/4 teaspoons of celery seed
- Couple of dashes of celery salt (you will be adding more salt later, so go easy)
- Few dashes of white pepper–about 1/2 tsp to 3/4 tsp or more to taste (you can use black pepper, but the white pepper is so much nicer)
- A splash of Cider Vinegar (this is key) equivalent to maybe two or three tablespoons
- One to two tablespoons of dry mustard (you can leave this out, but it’s sooooo good and gives the filling a nice subtle kick)
- A pinch of sea salt
- A pinch or two of garlic salt
Taste the filling to be sure it’s to your liking, adding more seasoning if needed.
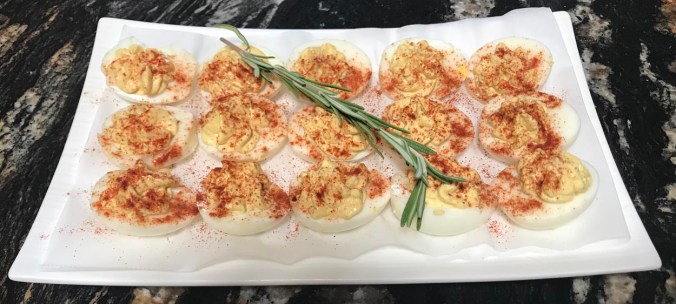
Stir together really well, making sure all the egg yolks are pretty well smooth. It doesn’t have to be perfectly smooth as it’s always nice to have a tiny bit of texture. Fill eggs. Dust with paprika (do not use smoked paprika) and chill.
Once chilled be prepared to amaze your family and friends with this delectable treat!
Bon Appétit!